
Guide
Scan a notarized document so the seal and stamp show
Scan a notarized document in color, flat, in daylight, with the flash off. Ink stamps show easily; a raised (embossed) seal has no ink, so light it from one side, such as a window to your left, so its edges cast small shadows. Use Scan Documents in Preview, Notes or Files, keep every page in one PDF, and zoom in to check the notary’s name, commission details, signature and seal are readable. A scan is a copy: it doesn’t carry the notarization itself.

This page is about one hard detail: making the notary’s stamp, the embossed seal or the apostille readable on a phone scan. For general lighting and background advice that applies to every scan, see the best light for scanning.
This is general information, not legal advice. Whether a scanned copy is accepted, and whether you need the notarized original, a certified copy or an apostille, depends on the office asking. Check their instructions; rules change.
Why seals are hard to scan
A notarized page usually carries up to three things the reviewer looks for:
- An ink stamp, often in blue, purple or black, with the notary’s name, commission number and expiry date.
- A raised seal, pressed into the paper with no ink, sometimes over a gold foil sticker.
- Signatures, of the signer and the notary.
Ink stamps scan like any other ink, as long as you keep color. Raised seals are the problem: they’re white on white. A scanner app tuned to make pages bright and even is, in effect, trying to erase them. That’s why a seal that’s obvious in your hand can vanish on screen.
Prepare the document
- Remove staples and clips if you can do so without damaging the paper, and don’t separate pages that a notary has bound together with a ribbon or grommet. Scan those as they are.
- Flatten it. A folded document leaves shadows along the folds that can run through the stamp.
- Pick a dark, matte surface near a window. The dark background lets the scanner find the page edges.
Light the seal from the side
This is the step that makes an embossed seal show.
- Turn off overhead lights and use one window as your light source.
- Put the document so the window is to one side, not behind you or straight ahead. Light skimming across the page catches the raised edges and gives them tiny shadows.
- Turn the flash off. Apple’s Notes scanner lets you adjust Flash before you capture. Flash fires straight at the page and flattens the relief, and it bounces off foil seals.
- Rotate the page a quarter turn and look again if the seal is still faint. Some seals show best with light from above the page, some from the side.
If the stamp is on a foil sticker, tilt the page slightly until the reflection of the window slides off the seal. More on shiny paper is in scanning glossy paper without glare.
Scan it in color
- Open Preview (iOS 26 and later) and tap Scan Documents, or in Notes tap the Attachment button and then Scan Documents.
- Before capturing, check that the filter is set to color, not black and white or grayscale. A black-and-white filter turns a faint seal into blank paper and a blue stamp into black smudges.
- For the page with the seal, use manual capture: in Preview, tap Auto so it reads Manual, wait until the seal is clearly visible on screen, then tap the Shutter button.
- Drag the corners to the edges of the page and tap Keep.
- Scan every page, including the notary’s certificate page and any attached apostille, then tap the Done button.
Keep all pages of one notarized document in one PDF, in their original order. The notarial certificate belongs with the document it certifies.
Check the scan before you send it
Zoom in to full size and look at each of these:
- The notary’s stamp: name, commission number and expiry date readable.
- The raised seal: its outline and lettering visible, even if faint.
- Signatures: complete, not cut by the page edge.
- The apostille, if there is one: every numbered field readable.
- The whole page: all four corners inside the frame, nothing cropped.
The Canadian pharmacy regulator’s checklist is a useful bar: the notarization or seal must be clear and legible, stamps and seal impressions fully visible, notarized documents scanned in color, and grayscale refused. If your scan would pass that, it will pass most offices.
Scans, certified copies and apostilles
- A scan is a copy. It shows that a document was notarized; it doesn’t make the copy notarized. Many offices accept a scan for an online application and ask for the original later.
- A certified copy is a copy someone authorized confirms is true. See what a certified copy is.
- An apostille is a certificate under the 1961 Apostille Convention that lets a public document be used in another member country without further legalization. Some authorities now issue e-Apostilles in digital form, which the Hague Conference says can’t be refused simply because they’re electronic. More in what an apostille is.
If you’re scanning papers like a birth certificate that carry a raised seal of their own, scanning a birth certificate covers that document in detail.
Where Scanner One helps, and where it doesn’t
Scanner One finds the edges of the page automatically and corrects the perspective. Scans come with Auto Clean, Color, Grayscale and Receipt filters. For a notarized page, pick Color and leave the stronger cleanup filters off the seal page so a faint embossed seal isn’t bleached out.
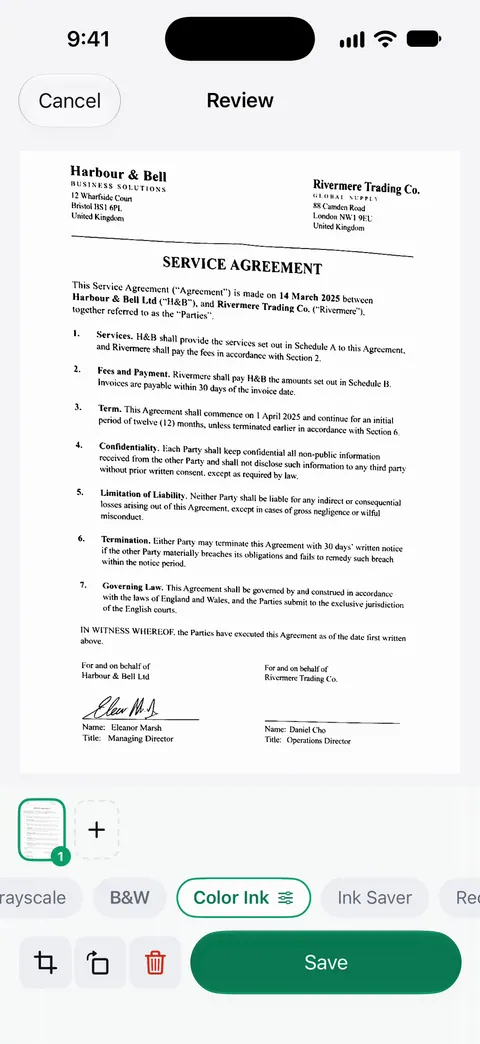
A scan can have many pages, and you can reorder them. That keeps the certificate page and any apostille with the document in the right order.
Before sending from a free account, know that On a free account, pages you share, print or export carry a small “Scanned with Scanner One” label at the bottom right. Pro removes it. If an office wants a copy with nothing added, export from Preview or use Pro.
What it doesn’t do: it can’t make a seal appear that the light doesn’t show, it doesn’t notarize, certify or apostille anything, and it can’t tell you whether an office will take a scan. When the built-in way is enough: Preview or Notes with the flash off, side light and color does this job well. More guides are in Guides.
Questions and answers
Is a scan of a notarized document still notarized?
No. The notarization is on the signed paper. A scan is a copy that shows the notary’s stamp and signature, which many offices accept for review. When an office needs the notarized original or a certified copy, it says so.
Why doesn’t my embossed seal show up on the scan?
A raised seal has no ink, so it only shows as light and shadow. Front light flattens it. Light the page from one side, such as a window to your left, and turn the flash off, so the raised edges cast tiny shadows the camera can see.
Should I scan a notarized document in color?
Yes. Some reviewers require it: one regulator’s scanning checklist asks for notarized documents in color and refuses grayscale. Color also keeps a colored ink stamp distinct from the text under it.
Can I send a scan of an apostille?
For a preview or a first review, often yes. The country or office that will rely on the apostille usually wants the original document with the apostille attached, or an e-Apostille it can verify. Ask before you post anything.
Sources
What this page says about Scanner One was checked against the app on .
- Alberta College of Pharmacy, Scanning guidelines and checklist for document submissions — notarization or seal must be clear and legible; scan notarized documents in color; stamps and seal impressions fully visible; no grayscale; updated June 2023
- HCCH, Apostille Section — what an Apostille is under the 1961 Convention, and that an e-Apostille is issued in digital form; read 2026-11-13
- iPhone User Guide (iOS 27), Scan text and documents in Notes — adjusting Flash and Filters before capture, manual capture and corners; read 2026-11-13
- iPhone User Guide (iOS 27), Scan text and documents in Preview — Scan Documents in Preview, Auto and Manual, adjusting the coloring of a scan; read 2026-11-13
- Scanner One on the App Store — the app’s own listing
Get Scanner One
Scanner One is free, with generous limits: scanning, clean PDFs and text search never stop.

Scanner OneScan, sign and ask anything
Scanner One is free, with generous limits: scanning, clean PDFs and text search never stop.