
Guide
Go paperless at home in one weekend
Friday evening, set up your folders and gather every paper into one box. Saturday, sort it into three piles (keep the original, scan then shred, recycle) and scan in batches. Sunday, check the scans, shred what you no longer need, and switch bills and statements to email. Keep the originals of birth and marriage certificates, Social Security cards, passports, titles, deeds and wills: a scan doesn’t replace them.

Before you start
You need less than you think:
- Your iPhone, charged, and somewhere with good light: a table by a window in the day, or a desk lamp.
- A dark, plain surface to scan on, so the page edges stand out.
- One big box for gathering, and three smaller piles or folders: Keep the original, Scan then shred, Recycle.
- A shredder, or a note of the next shred day near you.
- A plan for folders and names (below), decided before you scan the first page.
The plan at a glance
| When | What | Time |
|---|---|---|
| Friday evening | Set up folders, gather all paper into one box | 1 hour |
| Saturday morning | Sort into three piles | 2 to 3 hours |
| Saturday afternoon | Scan in batches, one folder at a time | 2 to 4 hours |
| Sunday morning | Check the scans, back them up | 1 hour |
| Sunday afternoon | Shred, recycle, stop new paper | 1 to 2 hours |
Friday evening: set up and gather
- Make your folders. In the Files app, under iCloud Drive, tap the More button, then New Folder. A plan that suits most homes: Inbox, IDs, Money, Taxes, Home, Health, Car, Warranties, Work. The guide to organizing documents on iPhone explains each.
- Pick a naming pattern. Date first, then who it’s from, then what it is: “2026-11-04 City Water bill”.
- Gather everything into the box: the kitchen drawer, the desk, the filing cabinet, the envelopes in the car.
Saturday morning: sort before you scan
Sorting first is what makes the weekend possible. Go through the box once and put every paper on one of three piles.
Keep the original (scan it too, then file the paper safely). The FTC lists these to keep forever and lock up:
- Birth certificates or adoption papers
- Social Security cards
- Valid passports, citizenship or residency papers
- Marriage licenses and divorce decrees
- Military records
- Wills, living wills and powers of attorney
- Retirement and pension plans
- Family members’ death certificates
- Vital health records
Also keep the originals of papers for things you own, such as a vehicle title or a home deed, while you own them.
Scan, then shred. Bills, statements, pay stubs, receipts you need for a return or a warranty, insurance letters, medical bills, school records.
Recycle without scanning. Junk mail, old catalogs, envelopes, duplicate copies, instructions for things you no longer own. Shred anything with your name and account details on it instead.
Saturday afternoon: scan in batches
Scan one folder’s pile at a time, so each document goes straight to the right place.
- In Files, tap the More button, then Scan Documents. (In Notes, tap the Attachments button, then Scan Documents.)
- Hold the phone above the page. In Auto mode it captures by itself when it finds the page; otherwise tap the Shutter button and adjust the corners, then tap Keep Scan.
- Keep scanning the pages of the same document, then tap Done.
- Choose the folder, tap Save, and rename the file with your pattern.
Tips that keep the pace up: staple-free pages scan faster, so remove staples while sorting. Do all the one-page bills in a row. Put a multi-page document’s pages in order before you start.
Sunday: check, back up, shred
- Check each folder. Open a sample of the scans. Every page there? Readable? Named right?
- Back it up. Make sure iCloud Drive is on, and copy the folders to a USB drive too. See how to back up scanned documents.
- Shred. The FTC’s advice is to shred papers with personal or financial information when you get rid of them. Its list of what to shred includes ATM receipts, credit and insurance offers, cleared checks after 14 days, old credit reports and expired cards and IDs.
- File the originals from the Keep pile in one fire-safe box or folder.
Before shredding tax papers, check how long to keep them. The IRS says to keep records for 3 years in most cases, and longer in some, such as 7 years for a loss from worthless securities or bad debt. The guide on which papers to keep after scanning has the details.
Stop the paper coming back
- Switch to e-statements for every bank, card, utility and insurer that offers them. Save each new statement to its folder when it arrives.
- Scan on arrival. Keep a tray by the door. Once a week, scan it and empty it.
- Make Inbox a habit. New scans go into Inbox; on Sunday, name and file them. Ten minutes a week keeps the system working.
Where Scanner One helps, and where it doesn’t
Everything above works with the Files app and Notes, for free. If you’re happy to rename and file each scan yourself, you don’t need an app.
Scanner One is made for the scanning afternoon. Point your camera at any piece of paper. Scanner One finds the edges, straightens the page, cleans it up and saves a real PDF. A scan can have many pages, and you can reorder them. Then it reads the text, names the document, tags it and puts it in the right folder. So the naming and filing step, the slowest part of a paperless weekend, happens as you scan.
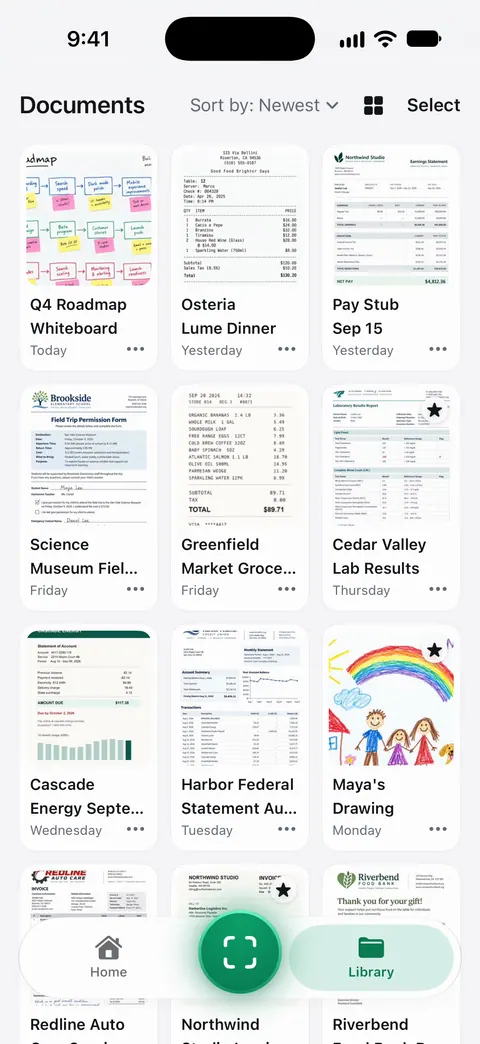
Later, finding a paper is a search: Search looks inside the text of every document and shows the matching line and page.
The limits, plainly:
- Free accounts get smart filing for 10 documents a month. A big backlog runs past that in an afternoon; scanning and text search keep working. Scanner One is free, with generous limits: scanning, clean PDFs and text search never stop.
- Pro removes every limit. Scanner One Pro costs $29.99 a year in the US, with a one-week free trial.
- On a free account, pages you share, print or export carry a small “Scanned with Scanner One” label at the bottom right. Pro removes it.
- No app tells you which originals to keep. That’s the Keep pile above.
Needs You gathers bills due, return windows and IDs about to expire on Home, from your own papers.
For a different approach to the same job, the paperless weekend method works in three passes, and the keep or shred chart is handy to print.
Questions and answers
How long does it take to go paperless?
A typical household’s backlog fits in a weekend if you sort before you scan and scan in batches. The first few hours go to sorting; scanning is quicker than people expect once papers are in piles.
Can I shred everything once it’s scanned?
No. Keep the originals of vital and ownership papers: birth and marriage certificates, Social Security cards, passports, citizenship papers, wills, titles and deeds. The FTC suggests many bills and statements can be shredded once you can access them electronically.
Do I need a document scanner?
No. An iPhone scans well in Notes or the Files app. A sheet-fed scanner is faster for thousands of pages; for a household backlog, a phone is enough.
What do I do without a shredder?
The FTC suggests looking for a local shred day in your community. Many credit unions, banks and city offices hold them.
Sources
What this page says about Scanner One was checked against the app on .
- Apple Support, How to scan documents on your iPhone or iPad (article 108963) — scanning in Notes and in the Files app; published 2026-02-13
- FTC Consumer Alert, Protecting your personal information: Which documents to keep and which to shred — what to keep for a year, three years, while you own it and forever, what to shred, and shred days; June 10, 2025
- IRS, How long should I keep records? — the periods for keeping tax records; page last reviewed or updated 2026-06-30
- Apple iPhone User Guide, Organize files and folders in Files on iPhone — creating folders and tags in the Files app; iOS 27 guide, undated, read 2026-11-13
- Scanner One on the App Store — the app’s own listing: scanning, filing and search
Get Scanner One
Scanner One is free, with generous limits: scanning, clean PDFs and text search never stop.

Scanner OneScan, sign and ask anything
Scanner One is free, with generous limits: scanning, clean PDFs and text search never stop.